The Chain Reaction Behind Truly Crispy Fried Chicken — Brine, Starch, and the Double-Fry Method Explained
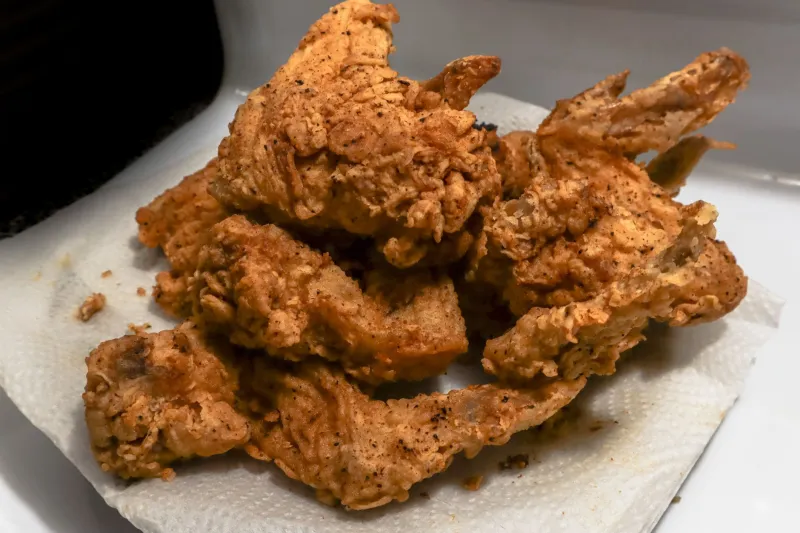
Let's be honest: most of us have stood over a plate of homemade fried chicken, taken one bite, and felt a quiet disappointment. The crust is there. The flavor is decent. But that crack — that glassy, shatteringly crispy shell you get at your favorite spot — just isn't happening. You blame the oil. You blame the breading. You maybe even blame the chicken itself.
But here's the thing: crispiness in fried chicken isn't one event. It's a chain reaction. And if any link in that chain is weak, the whole thing falls apart — sometimes literally, right there on the plate. Understanding what's actually happening at each stage is the difference between fried chicken that's just fine and fried chicken that makes people go quiet at the dinner table.
Why Buttermilk Isn't Just for Flavor
Most recipes tell you to soak your chicken in buttermilk because it "tenderizes" the meat and adds tang. Both things are true, but they're underselling what the brine is actually doing.
Buttermilk is mildly acidic, sitting around a pH of 4.5. When chicken soaks in that environment, the acid begins breaking down some of the surface proteins — specifically, it disrupts the tight coiled structure of myosin, one of the primary muscle proteins. This partial denaturation does two things: it relaxes the muscle fibers so they hold moisture better during the high-heat fry, and it creates a slightly rougher, tackier surface on the meat.
That tacky surface is your best friend. It's what gives the coating something to grip. Without it, even a perfectly seasoned flour dredge can slide off during frying or fail to bond tightly enough to create a unified crust. The brine isn't prep work — it's structural engineering.
For best results, aim for a soak of at least four hours, though overnight is ideal. The proteins need time to respond. A 30-minute dip barely scratches the surface.
The Starch Question — And Why Flour Alone Isn't Enough
Here's where a lot of home recipes quietly go wrong. All-purpose flour is the default for fried chicken coatings, and it works — to a point. But flour is high in protein, and protein, when it hits hot oil, can turn gummy or dense before it fully crisps. That's the coating that looks golden but bends instead of shatters.
Cornstarch changes that equation. It's almost pure starch with very little protein, and when it hits oil above 350°F, it undergoes gelatinization and then rapid dehydration — essentially forming a rigid, glass-like matrix around the chicken. Think of it as the difference between a soft foam pad and a ceramic tile. Both cover the surface. Only one is truly hard.
The sweet spot most cooks land on is a blend: roughly one part cornstarch to two or three parts all-purpose flour. The flour gives you the familiar golden color and the body to hold seasoning. The cornstarch provides the structural rigidity that creates actual crunch. Some recipes push the cornstarch ratio even higher — closer to 50/50 — for an extra-glassy crust, which is closer to what you'll find in Korean-style fried chicken.
One more coating tip: after you dredge the chicken, let it sit on a wire rack for at least 15 minutes before it goes into the oil. This rest period allows the coating to hydrate and adhere fully. Skip it, and you'll notice patches of the breading lifting off as soon as the chicken hits the oil.
Oil Temperature Is a Moving Target
Home cooks tend to think of oil temperature as a fixed setting — heat it to 350°F and hold it there. But the moment a cold piece of chicken enters the pot, the temperature drops. Significantly. Depending on how cold your chicken is and how large the pieces are, you can see the oil temp fall 30 to 50 degrees in seconds.
That drop matters enormously. Oil that's too cool means the coating absorbs fat before it can set, which produces greasy, heavy chicken rather than crispy chicken. The crust never gets the chance to dehydrate properly — it just soaks.
The fix is twofold. First, start your oil hotter than you think you need — around 375°F — so that when the chicken goes in, the temperature settles into the ideal 325–350°F frying range. Second, don't crowd the pot. Every piece you add drops the temperature further. Work in small batches, and give the oil a minute or two to recover between rounds.
The Double-Fry: Not a Trick, a Technique
If you've ever wondered why certain fried chicken recipes call for two separate frying sessions, it's not a restaurant gimmick. It's applied food science.
During the first fry, the goal isn't a finished crust — it's cooking the chicken through. You're essentially poaching it in hot fat, driving the internal temperature up to a safe 165°F while the coating begins to set. But at this stage, the crust still contains a fair amount of moisture. It looks done, but it's not fully crispy yet.
Here's the part most recipes leave out: after the first fry, let the chicken rest on a wire rack — not a paper towel — for at least 10 to 15 minutes. During this rest, residual heat continues to cook the interior while steam escapes from the crust. If you put the chicken directly on paper towels, that steam gets trapped underneath and turns the bottom of your crust soggy. The wire rack keeps air circulating on all sides.
The second fry is short and hot — two to three minutes in oil at 375°F. This final blast of heat drives off the last of the moisture in the coating, completing the dehydration process that creates the rigid, glassy crust you're after. The Maillard reaction, which is responsible for the deep golden-brown color and complex savory flavor, also accelerates during this second fry.
The result is a crust that stays crispy longer — even as the chicken cools — because it has been fully dehydrated rather than just browned on the outside.
Putting It All Together
Crispy fried chicken isn't magic, and it's not a secret ingredient you're missing. It's a sequence: an acidic brine that creates surface adhesion, a starch-forward coating that forms a rigid shell, careful oil temperature management, and a two-stage frying process with a proper rest in between.
Change one step and you'll notice a difference. Change all of them and you'll stop wondering why the restaurant version is better than yours — because it won't be anymore.