Stop Blaming Yourself for Dry Chicken — Blame Your Technique Instead
Let's be honest about something. Boneless, skinless chicken breast has a reputation problem, and most of it is deserved — but not for the reasons people assume. Home cooks chalk up dry, chewy chicken to bad luck, a too-hot pan, or simply the nature of the cut. The truth is messier and more instructive than that. Chicken breast goes wrong for specific, diagnosable reasons, and once you understand them, four genuinely different techniques can fix the problem depending on how much time and patience you've got on a given weeknight.
This isn't a piece about cooking chicken low and slow forever or drowning it in sauce to mask the damage. It's about understanding what's actually happening inside the meat — and intervening at the right moment.
The Real Culprits (It's Not Just Heat)
The most common explanation for dry chicken is overcooking, which is true but incomplete. Here's what's actually going on:
Misleading internal temperature targets. For decades, the USDA recommended cooking poultry to 165°F — a number designed for commercial food safety, not home cooking quality. At 165°F, chicken breast is already past its prime. The proteins have tightened significantly and expelled much of their moisture. What most cooks don't realize is that food safety is a function of both temperature and time. Chicken held at 155°F for just under a minute achieves the same pathogen reduction as an instant hit of 165°F. Pulling your breast at 155°F to 160°F and resting it briefly is safe and dramatically more palatable.
Carryover cooking. This is the physics problem nobody talks about enough. When you pull meat off heat, the temperature at its center continues to rise for several minutes as residual heat from the exterior migrates inward. For a thick chicken breast, that carryover can add 5 to 10 degrees to your final internal temperature. If you're pulling at 165°F, you're eating 170°F to 175°F chicken. That's shoe leather territory.
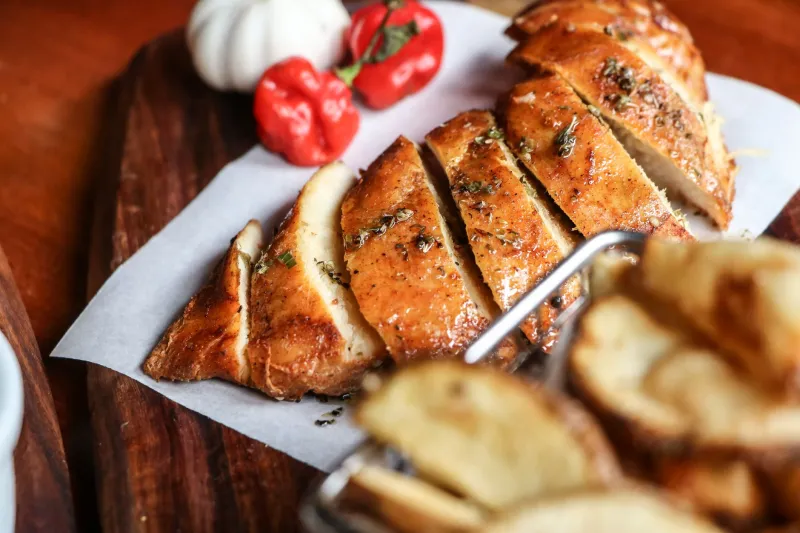
Uneven thickness. A standard grocery-store chicken breast is not a uniform piece of meat. It's thick in the middle, thin and tapered at one end, and sometimes absurdly large overall. The thin end is fully cooked — or overcooked — long before the thick center reaches a safe temperature. You're fighting the geometry of the cut every time you put it in a pan as-is.
Fix #1: Dry Brine It the Night Before
Dry brining is the lowest-effort intervention on this list, and it works through straightforward osmosis and protein chemistry. Sprinkle kosher salt — about ¾ teaspoon per pound — generously over the surface of your chicken breast and let it sit uncovered in the refrigerator for at least an hour, ideally overnight.
In the first 20 to 30 minutes, the salt draws moisture out of the meat through osmosis. Then something more interesting happens: that salty liquid gets reabsorbed back into the muscle fibers, where it begins to denature proteins and break down some of the tighter muscle structures. The result is meat that's seasoned all the way through and noticeably more tender — not because you added water, but because you changed the protein structure of the meat itself. The exterior also dries out during the uncovered fridge time, which means better browning when it hits the pan.
This is a Tuesday-night technique. Salt it Monday evening, cook it whenever you get home.
Fix #2: Pound It Flat (Or Butterfly It)
This one is pure geometry. A chicken breast pounded to an even ½-inch thickness across its entire surface cooks uniformly — every part of the meat reaches the target temperature at roughly the same time. No more sacrificing the thin end to save the thick center.
Place the breast between two sheets of plastic wrap or in a zip-top bag and use a meat mallet, rolling pin, or even a heavy skillet to pound it to an even thickness. Alternatively, butterfly the breast by slicing horizontally almost all the way through and opening it like a book. Either approach cuts your cook time dramatically — a pounded breast is often done in 3 to 4 minutes per side over medium-high heat — and the increased surface area means more Maillard browning, which is where flavor lives.
This technique pairs naturally with dry brining. Do both.
Fix #3: Reverse Sear for Thick Cuts
If you're working with a particularly large breast and you want to keep it whole, reverse searing flips the conventional logic of cooking. Instead of searing first and finishing in the oven, you start the chicken in a low oven (275°F works well) until it reaches about 140°F internally, then sear it in a ripping-hot cast iron skillet for 60 to 90 seconds per side.
The low, slow oven phase allows the internal temperature to rise gradually and evenly — there's no steep gradient between a scorching exterior and a cool center. By the time you sear, you're just building crust, not cooking the interior. Carryover is also far more predictable after a gentle oven cook than after high-heat stovetop work. You'll get a properly cooked center and a genuinely browned exterior without the guesswork.
This takes more time upfront, but it's nearly impossible to overcook if you're using a thermometer.
Fix #4: Velvet It Like a Chinese Restaurant
This is the technique most American home cooks have never tried, and it produces results that feel almost unfair. Velveting is a Chinese cooking method in which chicken is marinated briefly in a mixture of egg white, cornstarch, and sometimes a splash of rice wine or baking soda, then either blanched in water, poached in oil, or stir-fried over extremely high heat.
The cornstarch and egg white form a protective coating around each piece of meat that insulates it from direct heat, slows moisture loss, and creates the silky, almost custard-like texture you've noticed in takeout dishes and wondered about. The baking soda variation — sometimes called water velveting — goes a step further by raising the pH of the meat's surface, which slows protein coagulation and keeps the texture tender even at higher temperatures.
For a quick weeknight stir-fry, slice chicken breast thin against the grain, toss with 1 teaspoon cornstarch, 1 teaspoon soy sauce, and a pinch of baking soda per pound, and let it sit for 15 to 20 minutes. Cook it in a very hot wok or skillet and it will stay tender regardless of how fast you're moving.
The Bigger Lesson
Every one of these techniques addresses a specific, identifiable failure point. Dry brining fixes the seasoning and protein structure problem. Pounding solves the geometry problem. Reverse searing neutralizes carryover. Velveting physically shields the meat from aggressive heat. None of them require special equipment or advanced skill — they require understanding why chicken goes wrong in the first place.
Once you've got that part figured out, you can stop dreading the most common protein in the American supermarket and start using it with something approaching confidence.
