Low Oven First, Sear Second — The Temperature Science Behind a Steak Method That Actually Delivers
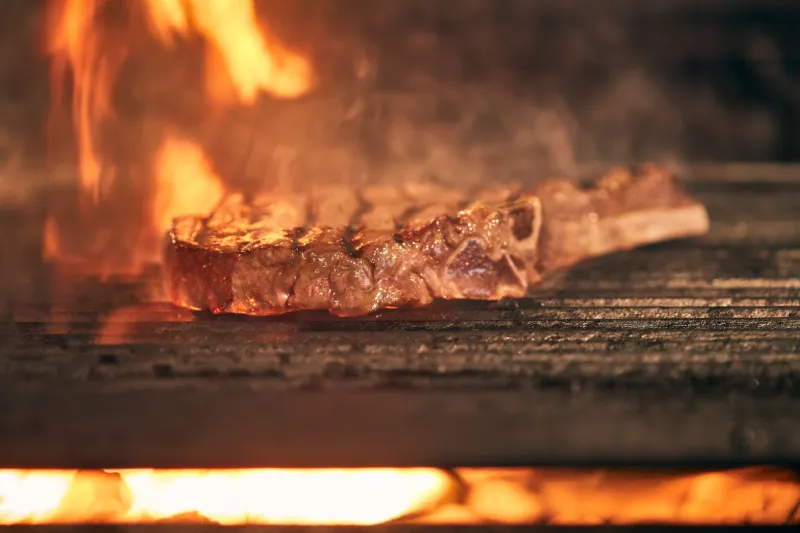
If you've spent any time in cooking forums or food media over the past decade, you've heard about the reverse sear. It's the technique where you cook a thick steak in a low oven first, then sear it in a screaming-hot pan at the end — the complete opposite of what most of us learned. It has devoted fans, and it produces genuinely impressive results.
But most of the people cooking this way can't fully explain why it works. They know it does — the crust is better, the interior is more evenly cooked, the whole thing just feels more controlled. What they're missing is the temperature science underneath all of it, and understanding that science is what lets you actually use the technique intelligently instead of just following steps.
Let's get into it.
The Problem With Traditional Searing: The Gradient
When you sear a steak the conventional way — hot pan first, then oven to finish — you're starting with an aggressive heat event. A screaming-hot cast iron or stainless pan drives intense heat into the surface of the meat almost instantly, building that dark, flavorful crust through the Maillard reaction.
But here's the issue: that surface heat doesn't stay at the surface. It starts moving inward immediately. By the time you pull the steak off the stove and put it in the oven, the outer layer is already significantly hotter than the interior. The oven then has to bring the center up to your target temperature (say, 130°F for medium-rare) while the outer layer keeps climbing.
The result is a temperature gradient — a gradual slope from overcooked gray meat near the surface to perfectly pink meat in the center. On a thin steak, this is barely noticeable. On a thick-cut ribeye or a two-inch-thick tomahawk, that gray band can be substantial. You're essentially paying for expensive beef and then overcooking 30 to 40 percent of it.
What the Low Oven Actually Does
The reverse sear solves the gradient problem by changing the sequence of heat events.
When you start a thick steak in a low oven — typically somewhere between 225°F and 275°F — you're introducing heat very slowly and from all directions simultaneously. The oven surrounds the meat with warm air, which transfers heat gently and gradually. The exterior of the steak rises in temperature, yes, but not dramatically faster than the interior. The whole piece of meat is moving toward your target temperature together.
At 250°F, a two-inch ribeye might take 45 to 55 minutes to reach an internal temperature of 125°F. During that time, the temperature gradient from surface to center stays narrow — sometimes just 5 to 10 degrees difference across the entire steak. When you pull it out and look at a cross-section, almost the entire interior is the same rosy color. There's virtually no gray band.
This is the core of what the reverse sear delivers: not a better crust (that comes later), but a more uniformly cooked interior. The technique is fundamentally about controlling heat distribution, not about the sear itself.
Why the Sear at the End Is Actually Better
Here's a bonus that most explanations gloss over: the sear you get at the end of the reverse sear process is often superior to the one you'd get at the beginning.
When you do the oven phase first, the exterior of the steak dries out slightly. Low oven heat evaporates surface moisture, which is exactly what you want before searing. A dry surface browns faster, more evenly, and with less steaming than a wet one.
With traditional searing, the raw steak comes out of the fridge or off the counter with moisture on its surface. That moisture has to evaporate before the Maillard reaction can really get going, which means you're wasting precious time in a hot pan before actual browning begins. By the time the surface is dry enough to properly sear, the interior temperature has already been climbing for minutes.
With the reverse sear, you hit a dry surface with a blazing-hot pan and get an almost immediate, aggressive crust. Some cooks rest the steak uncovered in the fridge for 30 minutes after the oven phase and before searing, further drying the surface. The crust that results is thinner, darker, and more evenly developed — a real improvement over what most home cooks get from a traditional approach.
Resting: The Reverse Sear Changes This Too
Traditional steak wisdom says to rest your meat after cooking so the juices redistribute. With a conventional sear-then-oven method, resting is critical — the steak is still actively cooking from residual heat when it comes off the heat source, and the internal temperature can rise another 5 to 10 degrees if you cut into it too soon.
With the reverse sear, this carryover cooking is minimal. The steak came out of a low oven at a controlled temperature, not a screaming-hot pan or a 450°F oven. The sear at the end is fast — two to three minutes total — and doesn't drive much heat into the interior. The steak barely needs to rest. Many cooks slice and serve almost immediately, which is a genuine practical advantage when you're trying to get dinner on the table.
When to Skip It and Go Traditional
The reverse sear isn't universally better. It's specifically better for thick cuts — steaks that are at least an inch and a half, ideally two inches or more. Anything thinner cooks through so quickly that the gradient problem barely exists, and spending an hour on a thin sirloin in a low oven just makes the timing awkward.
It's also a technique that requires planning. You need 45 minutes to an hour for the oven phase, plus prep and searing time. On a weeknight when dinner needs to happen in 20 minutes, a hot cast iron and a butter baste is the right call.
And for cuts like flank steak or skirt steak — thin, fibrous, and best cooked hot and fast — the reverse sear makes no sense at all. These cuts want high heat and a short cook time. The technique is built for thick, high-quality, expensive cuts where precision matters and the cost of getting it wrong is real.
The Bottom Line
The reverse sear works because of physics, not because it's trendy. Starting in a low oven controls the temperature gradient from the outside in, producing a more evenly cooked interior with a minimal gray band. The subsequent sear on a pre-dried surface produces a better crust than you'd get on a raw steak. And the reduced carryover cooking means you can serve faster.
Know why it works, and you'll know when to use it — and when the traditional method is still the right one for the job.